Greetings, loyal readers! My apologies for not adding to An English Cook in America for some time. The truth is that I have decided to change the way I write about food. This blog will remain, but I won't be adding to it any further. Instead, my new posts will be on my sister blog, The Scientist and the Artisan. The format of the new blog is different, and I am playing around with getting into my subject a little more. So there will be more writing about food - more background and more personal input from yours truly. If this is not your thing, feel free to skip to the end for the recipe. There will also be more science (which I think really demystifies cooking) and more creative options - mainly variations, twists and ideas. I am using this new blog to explore my artistic side a little more. I hope you enjoy the new format, but feel free to let me know either way!
Thanks,
Ben
Monday, January 23, 2012


Sunday, July 17, 2011
BBQ Chicken Pizza

I made the pizza dough similarly to the one here, except that I did not use a machine to mix/knead it. This necessitated a stiffer (less wet) dough, in order for it to be easier to work with. So I started with 7.5 oz tepid (just warm) water and 0.1 oz instant yeast in a large bowl. Then I added 8.8 oz flour (I used bread flour, but you could use All-Purpose) and 0.2 oz salt, and mixed it with a large spoon. This resulted in a wet dough.
Next, I floured my counter and tipped the dough out onto it. I shook out more flour over the top of the dough, and started pushing it around, adding more flour when my hands stuck to it too much. Then I started kneading - using the heel of my hand to push the dough away from me, then pulling it back with my fingers. Keep adding flour if it is too sticky to handle. You can stop adding flour when it is just a little tacky. Continue to knead until the dough becomes smooth and elastic. At this point, you can put it back in your large bowl and cover with plastic wrap. Leave it in a warm place for about 2 hours until tripled in size.
While the dough is rising, prepare your toppings. I used a leftover roast chicken breast (i.e already cooked through), which was cut into 1 inch chunks and then heated gently in my homemade bbq sauce (recipe here, or you can use store-bought). Save some sauce for the pizza base also. Thinly slice half of a small red onion, and a good amount of meltable cheese (mozzarella is traditional - you will need enough to cover the base of the pizza). If you wish to use herbs, chop or tear them and set aside. As you can see from the picture, I used cilantro (coriander leaf), but I didn't think it worked so well. Next time, I'll try basil.
Towards the end of the two hours, preheat your oven to 500 F, with a pizza stone or upturned baking sheet on a lower shelf. Take another upturned baking sheet (or pizza peel if you have one) and put a sheet of parchment paper on top.
Once tripled in size, dump your dough out onto a floured counter, and shape it into a rough round (or whatever shape you want your pizza to be). Transfer it to your sheet/peel, and then slide it off onto the preheated stone/sheet in the oven.
Bake the base for about 8 minutes, until 'set' enough to top, but not too brown. Remove it from the oven (leave the stone/sheet in there) and top with your chicken, sauce, red onion and cheese. Return to the stone/sheet and continue to bake until everything is hot and the cheese is bubbling. Remove from oven. Sprinkle with herbs. Allow to cool a little. Enjoy!
Note 1 - Metric Info: 7.5 oz = 210g (7.5 oz water = 220ml); 0.1 oz = 3g; 8.8 oz = 250g; 0.2 oz = 6g; 500 F = 260 C.
Note 2 - Make sure you have plenty of flour to make the base. It will take much more than the initial 8.8 oz.
Tuesday, June 21, 2011
Tiramisu

I am proud of this one. It's not perfect, but it's pretty darn good, and my best effort so far. I made it for Shannon's birthday, as it's her favorite dessert. And it's made from scratch. That's right, I made my own ladyfingers, or savoiardi. Although this gives me a little smugness, I would only recommend it for die-hard from-scratch cooks. Not that they are that difficult to make (they are not), just that store-bought will save you time and probably hold their texture better. My ladyfingers came out a little soft.
Start by either brewing or obtaining some strong hot espresso - you will need about 1 cup (8 fluid ounces). Add to this 1 tbsp sugar and 1 miniature (50ml) of Kahlua or other coffee-flavored liqueur. Stir to mix and set aside in a wide bowl - you want a shallow pool of espresso.
You will need to make a double boiler for the next step (or, if you have a double boiler pan, you can use it instead - just put the yolks, sugar and wine in the top insert). This is simple - you find a metal bowl that will fit over a small-medium saucepan. Put a little (1/2 inch) water in the saucepan. The bowl must be the right size to fit over the pan without touching the water. Set the bowl aside and bring the water to a gentle simmer (be careful - if the yolks get too hot, they will scramble, and you will have to start again). In the metal bowl go 4 egg yolks, 1/2 cup (3.5 oz) sugar and 1/3 cup Marsala wine. Set the bowl on the double boiler and whisk the yolks. You will need to do this for about 10 minutes, until the yolks expand in volume and get hot to the touch (when you dip in a finger). At this point, remove the bowl from the heat, and whip the mixture until it cools down. If you have a stand mixer, use it (with the whisk attachment). A hand-held electric whisk would also be useful here.
Meanwhile, beat 1 lb mascarpone cheese with a fork or spoon until soft. Set aside. Whip 1 cup heavy cream just until it gets to stiff peaks (if you are using a stand mixer, pour the yolks into a new bowl, wash mixer bowl and whisk, and use it for the cream).
Now fold the cooled yolk mixture and cheese into the cream until mostly combined. Take a 11 x 8 x 2 inch baking dish and set it aside. You will need some ladyfingers. How many you will need depends on their size. I used about 16 of mine. Now you are ready to assemble the tiramisu. Take the ladyfingers and dip them quickly, one by one in the espresso bowl. The goal is to get them a little wet but not soaked. After dipping, use them to line the bottom of the baking dish in one layer. Next, spread half of your cheese mixture over the ladyfingers and make it nice and flat and even. On top goes another layer of dipped ladyfingers, and then on top of them goes the rest of the cheese mixture. Flatten and smooth the top, then dust it with cocoa powder and sprinkle with chocolate curls (I used dark chocolate and a vegetable peeler). Cover and refrigerate overnight, or for several hours.
Pull the tiramisu out of the refrigerator half an hour before you serve it. Dust the top with cocoa again, if desired (it will look better if you do this), slice and enjoy!

Metric Info: 1 cup = 240ml; 1/2 inch = 1cm; 3.5 oz = 100g; 1/3 cup = 80ml; 1 lb = 450g; 11 x 8 x 2 inches = 28 x 20 x 5cm.
Monday, June 20, 2011
Home-made Barbecue Sauce

It's a very simple sauce to make. Start by putting in a medium saucepan: 1 cup yellow mustard, 3/4 cup cider vinegar, 1/2 cup sugar, 1/4 cup brown sugar, 1/4 cup water, 2 tbsp chili powder, 1 tsp ground white pepper, 1 tsp ground black pepper, 1/4 tsp cayenne powder. Mix and bring to a simmer for 30 minutes.
Once the mixture has simmered for 30 minutes, add 1/2 tsp soy sauce, 2 tbsp (1oz) butter and 1 tbsp water. Stir well and simmer 10 minutes more. Your sauce is now ready to use.
To use it on grilled chicken, season your chicken legs and/or breasts with salt and pepper. Place on the hot part of the grill until you get a nice sear (good browning) on the underside, then flip and repeat on the second side. Flip again and brush generously with barbecue sauce. Grill for a few minutes, then flip and brush again. Continue until the chicken is just cooked through (check at the bone with bone-in meat) - white, opaque, and with clear juices. I always cut into the thickest section and check that it is completely done. Remove from the grill and allow the meat to rest for 10 minutes before eating.
Metric Info: 1 cup = 240ml; 1/2 cup = 120ml; 1/4 cup = 60 ml; 3/4 cup = 175ml; 1 oz = 28g.
Sunday, June 12, 2011
Chai Spiced Poached Pears

To start, make your simple syrup. Put 7 oz sugar and 2 cups water in a small saucepan, and bring to a boil, stirring occasionally. Once at a boil, reduce to a gentle simmer, add your spices and prep your pears.
The spices I used were: a slice of fresh ginger, a few cardamom seeds, a small piece of cinnamon stick, 2 or 3 cloves, a few black peppercorns and a pinch of fennel seeds.
I poached 2 Bartlett pears, but you can use any type of pear, and as many as you like, although the more you want to poach, the more syrup you'll need to cover them. Peel the pears, cut in half and remove cores, stem and tail. Once prepped thusly, put the pears in the simmering syrup, return to a simmer and cook until tender (a knife slides into the pear easily). Remove from the heat and cool in the syrup.
To serve, remove the pear halves from the syrup and enjoy with vanilla bean ice cream. The syrup can be saved and used again to poach more pears, as a base for sorbet, or even as a base for lemonade. Alternatively, you can strain out the spices and boil it down until thick and serve it with the pears.
Metric Info: 7 oz = 200g; 2 cups = 470 ml.
For red wine poached pears, click here.
Lemonade

Lemonade is easy, but it needs to be planned ahead. There are three ingredients - lemon juice, sugar and water. The first step is to make a sugar syrup. Put in a small saucepan - 1 cup of sugar and 2 cups of water. Bring to a boil, stirring occasionally, and then remove from heat and cool to room temperature, before chilling in the fridge. Meanwhile, juice 2 lb of lemons. A juicer would do the job nicely. I do not have one, so I cut them in half and juiced them by hand with a reamer. Pour the juice through a strainer to remove any small seeds (or a fine strainer if you don't like any pulp in your lemonade), and chill in the refrigerator.
Once syrup and juice are cold, you are ready to make your lemonade. Pour the juice into a bowl, and add half of the syrup. Taste. If the lemonade is too tart (acidic), add more syrup until it tastes right. Once the sugar balances the acidity, decide if the overall sweetness is to your liking. I like my lemonade less sweet, so I diluted it with cold water (about an equal volume of lemonade to water). Put some ice cubes in a glass and pour in your lemonade. Enjoy on a hot day!
Metric Info: 1 cup = 240 ml; 2 lb = 900g.
Chocolate Chip Cookies

Note that your butter should be left out at room temperature for about an hour before you start.
Start by creaming 8 oz softened butter (2 sticks; see above) with 1 cup sugar and 1 cup brown sugar. This means that you beat it with the paddle until it gets creamy and smooth. Reduce the speed on the mixer and add, one at a time, 2 eggs and 2 tsp vanilla extract, mixing until combined. Stop the mixer and combine 3 cups flour with 1 tsp baking soda and 1 tsp salt. Start the mixer on 'stir' speed, and slowly add the flour mixture, continuing to mix until combined. Then add 12 oz (1 bag) chocolate chips, and mix just long enough to disperse them evenly through the dough.
Line 3 cookie sheets with parchment paper, and scoop 1 tsp of dough per cookie, spaced 2 inches apart. Bake at 375 F in a preheated oven for 9-11 minutes, until just starting to brown. Remove immediately from the sheet to a wire rack to cool.
Enjoy with a large glass of cold milk!
Metric Info: 8 oz = 225g; 1 cup = 240 ml; 3 cups = 710 ml; 12 oz = 340g; 2 inches = 5 cm; 375 F = 190 C.
Monday, January 31, 2011
Anise Cookies
Sorry, no photo for this one - the cookies disappeared too quickly...
These are a simple 'cakey' (i.e. soft, not crisp) sugar cookie, flavored with anise extract.
Start by softening 1 cup (8 oz; 2 sticks) butter at room temperature for at least 1 hour. Once soft, beat in a mixer with the paddle attachment until smooth. Add 3/4 cup sugar and cream (keep beating until smooth again). Slow down to stir speed and add 3 cups flour, 3 tsp baking powder, 1/4 tsp salt and 1 tsp anise extract. Stir until combined, then stir in 2 eggs, until a smooth dough forms.
Form your dough into small balls, and set directly on 2 cookie sheets. Bake in a preheated oven at 350 F for 15 minutes, switching the sheets halfway through. Once the time is up, transfer the cookies to a cooling rack and allow to cool completely. Enjoy!
Note 1 - Be sure to use anise extract or anise flavoring for this recipe. Anise oil can be substituted, but very sparingly - 1/4 tsp would probably be too much. I made this mistake once, and the cookies were painfully anise-y!
Note 2 - Apologies for the lack of weight measures in this recipe. I threw these together quickly and did not figure out weights.
Note 3 - Metric Info: 8 oz = 225g; 3/4 cup = 180 ml; 3 cups = 700 ml; 350 F = 175 C.
These are a simple 'cakey' (i.e. soft, not crisp) sugar cookie, flavored with anise extract.
Start by softening 1 cup (8 oz; 2 sticks) butter at room temperature for at least 1 hour. Once soft, beat in a mixer with the paddle attachment until smooth. Add 3/4 cup sugar and cream (keep beating until smooth again). Slow down to stir speed and add 3 cups flour, 3 tsp baking powder, 1/4 tsp salt and 1 tsp anise extract. Stir until combined, then stir in 2 eggs, until a smooth dough forms.
Form your dough into small balls, and set directly on 2 cookie sheets. Bake in a preheated oven at 350 F for 15 minutes, switching the sheets halfway through. Once the time is up, transfer the cookies to a cooling rack and allow to cool completely. Enjoy!
Note 1 - Be sure to use anise extract or anise flavoring for this recipe. Anise oil can be substituted, but very sparingly - 1/4 tsp would probably be too much. I made this mistake once, and the cookies were painfully anise-y!
Note 2 - Apologies for the lack of weight measures in this recipe. I threw these together quickly and did not figure out weights.
Note 3 - Metric Info: 8 oz = 225g; 3/4 cup = 180 ml; 3 cups = 700 ml; 350 F = 175 C.
Ginger Cookies

These are icebox cookies, meaning that you make the dough the day before and chill it in the refrigerator overnight, so plan accordingly.
Start by softening 4 oz (1 stick) butter by leaving it at room temperature for at least an hour. Put it in a mixer and beat with the paddle until smooth. Add 8 oz brown sugar and 1 tbsp molasses, and cream (beat) together until smooth again. Slow the mixer down to stir and add 1 egg. Once incorporated, add 9.5 oz flour, 1/2 tsp baking powder, 1/2 tsp baking soda, 2 tsp ground ginger and 1/4 tsp salt. Mix just until combined. Lay out 2 pieces of parchment paper. Drop half of your dough onto each piece of paper and roll up into two 2 inch diameter logs. Twist the paper at the ends to 'seal' and set in the refrigerator overnight to chill.
The next day, preheat the oven to 375 F, and line 2 cookie sheets with parchment paper. Slice each log into 1/4 inch slices, and lay out on the cookie sheets. Bake for 8-10 minutes, switching the positions of the sheets halfway through. They are ready to remove when the centers have set but they are still soft. Remove the cookies from the sheet (keep them on the paper - just slide it off the sheet) to a cooling rack, and leave to cool. Enjoy!
Note 1 - For UK readers, molasses = treacle, and baking soda = bicarbonate of soda.
Note 2 - These cookies are halfway between chewy and crispy. The longer you leave them in the oven, the crispier they will become.
Note 3 - Metric Info: 4 oz = 110g; 9.5 oz = 270g; 2 inches = 5 cm; 375 F = 190 C; 1/4 inch = 6 mm.
Friday, December 3, 2010
Bakewell Tart

This one is an English classic - half tart, half cake, with jam, almond-flavored sponge and simple white icing. My mother used to make this quite often when I was a child, and it brings back memories.
There seem to be two schools of thought on how to make the cake. You can make a sponge cake, or you can make a pound cake. The ingredients are the same; what matters is exactly how you combine them. I made a sponge, but I'll detail how to do it as a pound cake at the end.
First, you need a tart shell, and it should be baked blind (this means empty; baked without filling). Find a recipe for the tart dough here, and you should barely need half of the recipe. Or you can use any other suitable pie/tart dough recipe. Roll it out fairly thinly and use it to line a greased 9-inch tart pan. I used a shallow 9 inch pie pan, as it is all I have, but I would recommend something deeper, as it will allow for a thicker cake layer (I was left with some extra sponge mix that wouldn't fit in the pan). Put the pan in the refrigerator for at least 30 minutes to chill the dough.
Next, top your dough with a piece of foil, and top that with some oven-safe weights (e.g. baking beans - dried beans reserved for baking). Bake at 350 F until it begins to brown (maybe 10-15 min), then remove the foil and weights and bake another 5-10 minutes to brown the base. Remove from the oven and allow to cool to room temperature.
Once your tart shell is cooled, brush the base with 1 egg white, beaten (save the yolk), then top with a thick layer of jam. I prefer raspberry, but the type of fruit is not set in stone. Set the pan aside while you make the filling.
For the filling, start by putting your yolk into a mixer bowl. Add 3 more eggs and 6 oz sugar, and set up like a double boiler - get about 1 inch of water simmering in a small saucepan, and set the mixer bowl in the top of the pan, ensuring that the bottom of the bowl is clear of the water. Whisk the eggs constantly while they are over the heat. Keep going until the eggs are very warm (you do not want them to get real hot, as they will eventually curdle). At this point, put the mixer bowl on your mixer and whisk the eggs until they triple in volume.
Meanwhile, melt 6 oz butter (and then allow to cool at room temperature) and sift 6 oz almond flour (aka ground almonds) or a mixture of almond flour and flour, or all flour if you prefer, with a pinch of salt.
Once the eggs are done, carefully fold in the flour mixture, the melted butter and a few drops of almond extract (use more if you did not use almond flour), just until blended. Pour into your tart shell and put straight into the oven (at 350 F) for about 30 minutes, until set and just starting to brown on top. Remove from the oven and cool in the pan on a rack.
Once the tart has completely cooled, you can ice it. Combine 2 floz milk and 4.5 oz powdered sugar and whisk until fully combined. Pour over the cake and spread into an even thin layer with a spatula or knife. Transfer the tart to the refrigerator to chill.
Once chilled, you can decorate the top of the tart with glacé cherries (candied preserved cherries; I could not find them so I substituted drained maraschino cherries). Slice; serve; enjoy!
Note 1 - Pound cake variation (this should yield a firmer cake filling): Keep quantities and ingredients the same, but begin by softening the butter (just leave at room temperature for about an hour; do not melt) and creaming it with the sugar in a mixer with the paddle attachment. Keep going until it is very light and creamy. Stir in the eggs (and yolk) and almond extract on low speed, then fold in the flours, pour into the prepared tart shell and bake until cooked through (toothpick inserted into center comes out almost clean).
Note 2 - Metric Info: 9 inches = 23 cm; 350 F =175 C; 6 oz = 170g; 2 floz = 60 ml; 4.5 oz = 130g.
Sunday, November 7, 2010
Poached Pears

Pears are my second favorite fruit, after dates. While there is little better than a ripe pear, an unripe pear can be poached and will taste great. I got hold of some Anjou pears from the store for this recipe, but you can use pretty much any kind, so long as they are not too soft.
Pears can be poached in a simple syrup (water and sugar) or in a wine or port syrup. Port is my favorite, but I didn't have any on hand, just 2 cups of red wine left over from making the beef stew. You could also use white wine if you like.
Start by boiling 2 cups red wine, 1 cup water and 10 oz sugar and some whole spices until the sugar dissolves. The spices are your choice. I like to use any or all of the following: clove, cinnamon, star anise, cardamom (remove from pods), black peppercorn. Once the 'mulled wine' is hot and the sugar dissolved, peel 3 pears. Cut in half and scoop or cut out the cores, stem and base. Immerse the pear halves in the wine mixture and return to a simmer. Cover your pan and cook gently until the pears are tender (soft but not mushy). Remove pears (chill in refrigerator) and strain out spices, then return the liquid to the pan and boil it down into a heavy syrup.
Serve the pears cold with warm syrup and ice cream (I used cinnamon ice cream - see variations here) or custard sauce. Any leftover syrup makes a great accompaniment to ice cream. Enjoy!
Note - Metric Info: 2 cups = 470 ml; 1 cup = 240 ml; 10 oz = 280g.
Boeuf Bourgignon (Beef Burgundy)

I don't know why it has taken me so long to write about this, as it is my favorite dish. The first time I ate it was in a restaurant in Paris. That was the moment I fell in love with French food. It was also an important moment in my life as a cook. It made me want to cook, and planted the seed of the idea to cook for a living.
Boeuf Bourgignon is basically stewing beef, braised in red wine (traditionally red Burgundy, hence the name), with bacon, pearl onions and mushrooms. Especially when it is cold outside, it doesn't get much better than that.
Start with your beef. This can be any of the cheaper beef cuts typically used for stews. I usually use chuck or round. You will need 1 lb of stewing beef. Cut it into large (about 1 inch) chunks, dry by blotting with paper towels, and season generously with salt and pepper.
Next, render 1 slice of bacon, diced in a large, heavy-bottomed saucepan or small stockpot (it must not be non-stick, it must have a lid, and it must be large enough to accommodate the entire stew). This means cooking it on medium-low heat until it gives up its fat. Let it get a little crispy but not burned. Remove the bacon and set aside in a bowl, leaving the fat in the pan. Add a splash of vegetable oil and turn up the heat. Next, add, in small batches (you must not overcrowd the pan, as it the meat will not sear) your beef chunks. Once the chunks are nicely browned on one side, flip them over and brown the second side. Be careful not to allow the oil to get too hot, as it can smoke and burn the meat. Remove the beef and set aside with the bacon. At this point, there should be brown stuff stuck to the bottom of your pan. This is flavor. Do not get rid of it!
Turn the heat down a little and add a splash more oil to your pan. Add about 12 oz mirepoix. Mirepoix is a mix of diced carrot (about 3 oz), celery (about 3 oz) and onion (about 6 oz). Add also 1 clove garlic, minced. Season with salt and pepper and saute until the onions start to soften (about 10 minutes). Add 2 tbsp flour, stirring for about 1 minute, then 1 tbsp tomato paste, stirring for another minute. Now add 1 cup red wine and 1 cup beef broth, along with 1 bay leaf and a little salt and pepper. Return the beef and bacon to the pan and bring up to a simmer, stirring to dissolve the goodness on the bottom of the pan. Put the lid on the pan. Simmer gently for 1.5 to 2 hours, until the beef is fork tender.
While the stew is cooking, peel 8 oz pearl (boiling) onions, halving them if large. Place in a flat pan (a small frying or omelet pan would work) with about 1 tbsp butter, a big pinch of sugar and a small pinch of salt. Cover with water and cook on medium heat until the water is all gone - be careful not to let them burn. Transfer to the stew once done, and allow them to cook in it.
Clean 10 oz button mushrooms (remove any dirt) and cut in half, leaving stems attached. Saute in a little butter with salt and pepper, until all of their liquid is gone. Add to the stew and allow them to cook in it.
Once your beef is cooked tender, check the seasoning of your stew and adjust as necessary. Remove the bay leaf before serving (as you can see from the picture, I forgot). Serve with potatoes (mashed, boiled, however you like) and/or crusty bread to mop up the sauce, and a glass of red. Enjoy! Serves about 4 people.
Note 1 - You can use all red wine (i.e. 2 cups) if you do not want to use beef broth. I am still undecided about which way is better.
Note 2 - Stewing beef can often be found pre-chunked in wrapped packs at the supermarket. This is fine, and saves you a step.
Note 3 - Provided your pan is oven-proof, you can cook the stew in the oven instead of on the stovetop. Bring it to a simmer on the stove and then transfer it to a 300 F oven (with lid on). Cook until the beef is tender.
Note 4 - You can use pretty much any kind of red wine for this stew. I almost always use something cheap - I am not of the belief that an expensive, well-balanced wine will taste any better than something very cheap. You are cooking most of the alcohol out and infusing a lot of other great flavors into it. Any balance will be completely changed. Not to say that a great wine wouldn't taste good in the stew - I just don't see the point in the expense. Probably a smart thing to do is buy a lower-priced red that you enjoy drinking. If you use 1 cup in the stew, that will leave you about 2 cups to drink with it.
Note 5 - Metric Info: 1 lb = 450g; 12 oz = 340g; 3oz = 85g; 6oz = 170g; 1 cup = 240 ml; 8 oz = 225g; 10 oz = 280g; 300 F = 150 C.
Banana Bread with Caramel Ice Cream
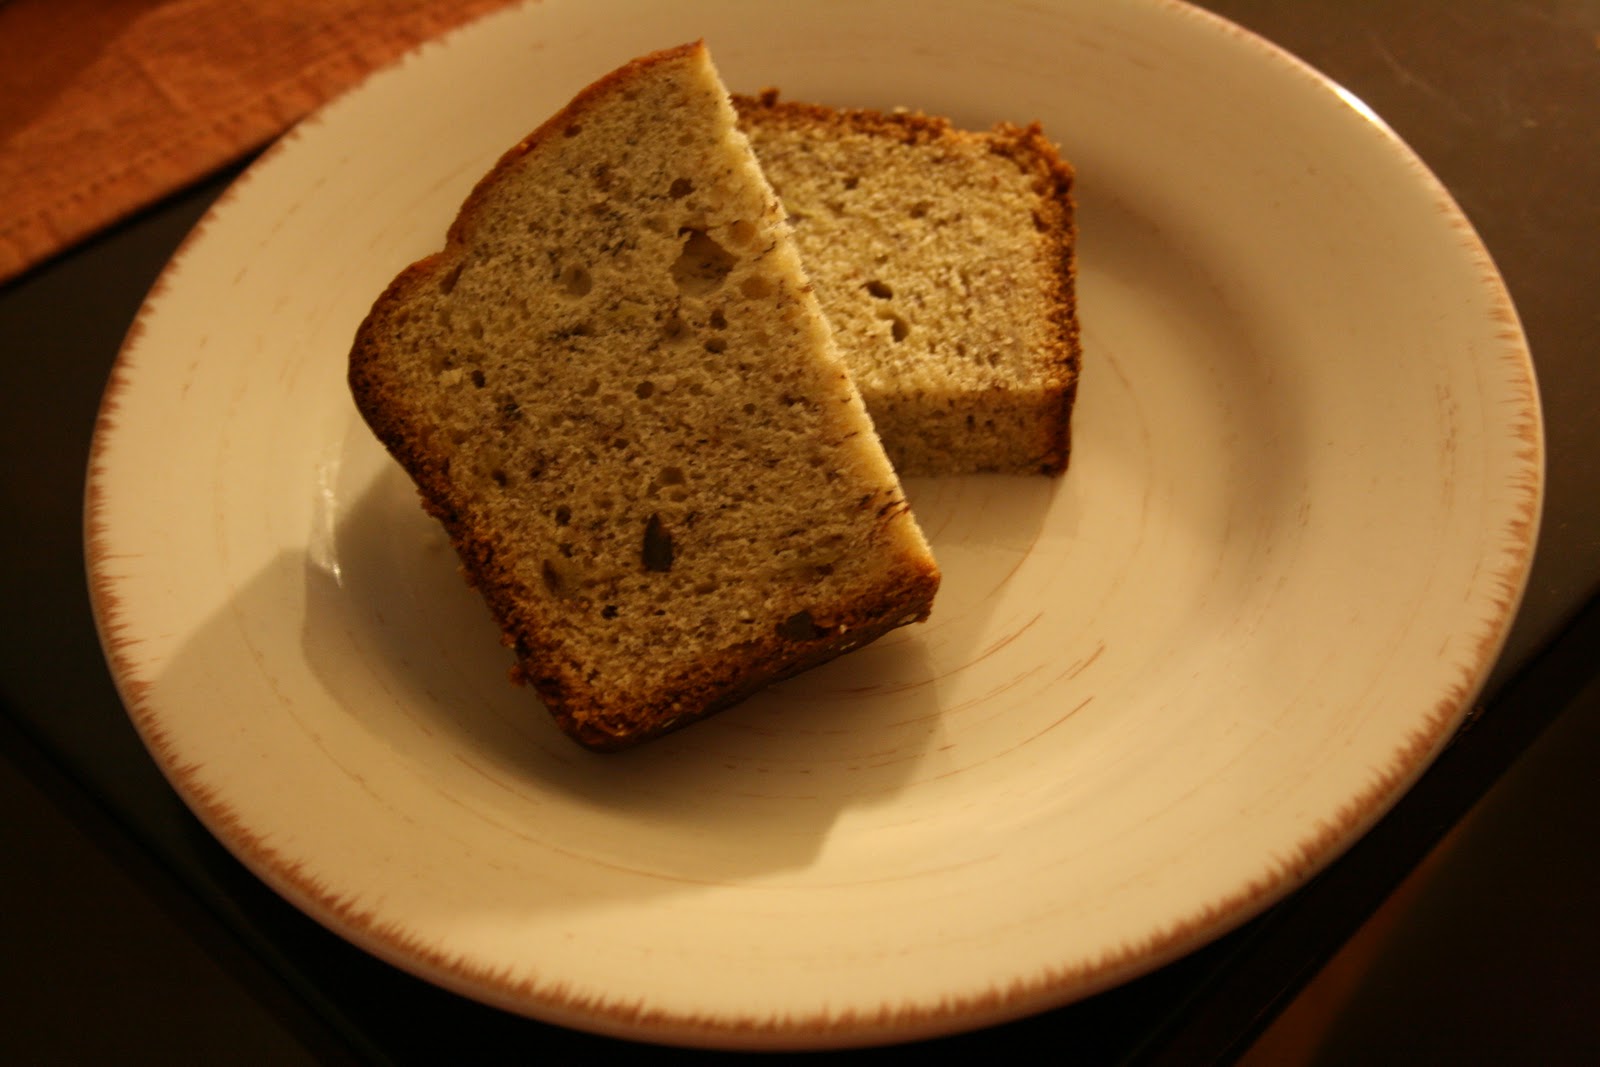
Start by softening the butter by pulling it out of the refrigerator and leaving it at room temperature for an hour. In a bowl, combine 2.5 cups (11 oz) flour with 2 tsp baking powder, 3/4 tsp salt and 1/2 tsp baking soda. In another bowl, mash 3 bananas and combine with 1/4 cup milk and 2 tsp vanilla extract.
In a stand mixer (or a large bowl with a hand mixer, or even with a whisk if you need to), beat 4 oz softened butter with 1 cup sugar until creamy. Beat in 2 eggs, then reduce the mixer speed and add about 1/4 of your dry mix. Once combined, mix in 1/3 of your wet mix, then keep going until the last 1/4 of your dry mix is in. Pour your batter into a greased loaf pan and bake at 350 F for at least an hour, until a toothpick inserted into the center comes out clean. Remove from the oven and cool in the pan for 10 minutes, then turn out onto a wire rack, and allow to cool completely. Wrap tightly with plastic wrap and foil and keep at cool room temperature overnight. It tastes better the next day. Enjoy!
To make the caramel ice cream, start by setting up a medium metal bowl on ice, with a strainer in it. Next, measure 7 oz sugar and enough water to make it wet in a heavy pan. Heat on medium until the sugar caramelizes (I like it to get golden brown, but no darker) to the desired point. Carefully (it will boil furiously) and slowly, add 1 pint half and half, stirring. Allow to return almost to a simmer, stirring regularly. Do not allow it to boil. Meanwhile, whisk 5 egg yolks. Ladle some hot half and half into the yolks. Whisk quickly and pour back into the saucepan. Cook, stirring with a wooden spoon, until the mixture thickens enough to coat the back of the spoon. When this point is reached, immediately pour it through the strainer into the cold bowl. Once the mixture has cooled a little, chill in the refrigerator and then churn in an ice cream machine. Transfer to the freezer for a few hours. Enjoy with the banana bread.
Note 1 - If you like walnuts in your banana bread, stir in 4 oz of chopped (preferably also toasted) nuts just before pouring the batter into the loaf pan.
Note 2 - Metric Info: 11 oz = 310g; 1/4 cup = 60 ml; 4 oz = 110g; 1 cup = 240 ml; 350 F = 175 C; 7 oz = 200g; 1 US pint = 470 ml.
Pumpkin Pie

It's almost Thanksgiving here in the U.S., and pumpkins have been available for a little while now. Time to start thinking about making pumpkin pie! First, a few words about the pumpkins themselves. There are several different kinds of pumpkins available on the market. Most are Jack pumpkins, which are ideal for carving, but are very bland when it comes to eating. The first pumpkin pie I made, shown above, was made with Jack pumpkin (although it was advertised as a 'pie pumpkin') - see below:

The next one, I used kuri squash for - a red squash, very good for soups and, it turns out, 'pumpkin' pies:

This resulted in:
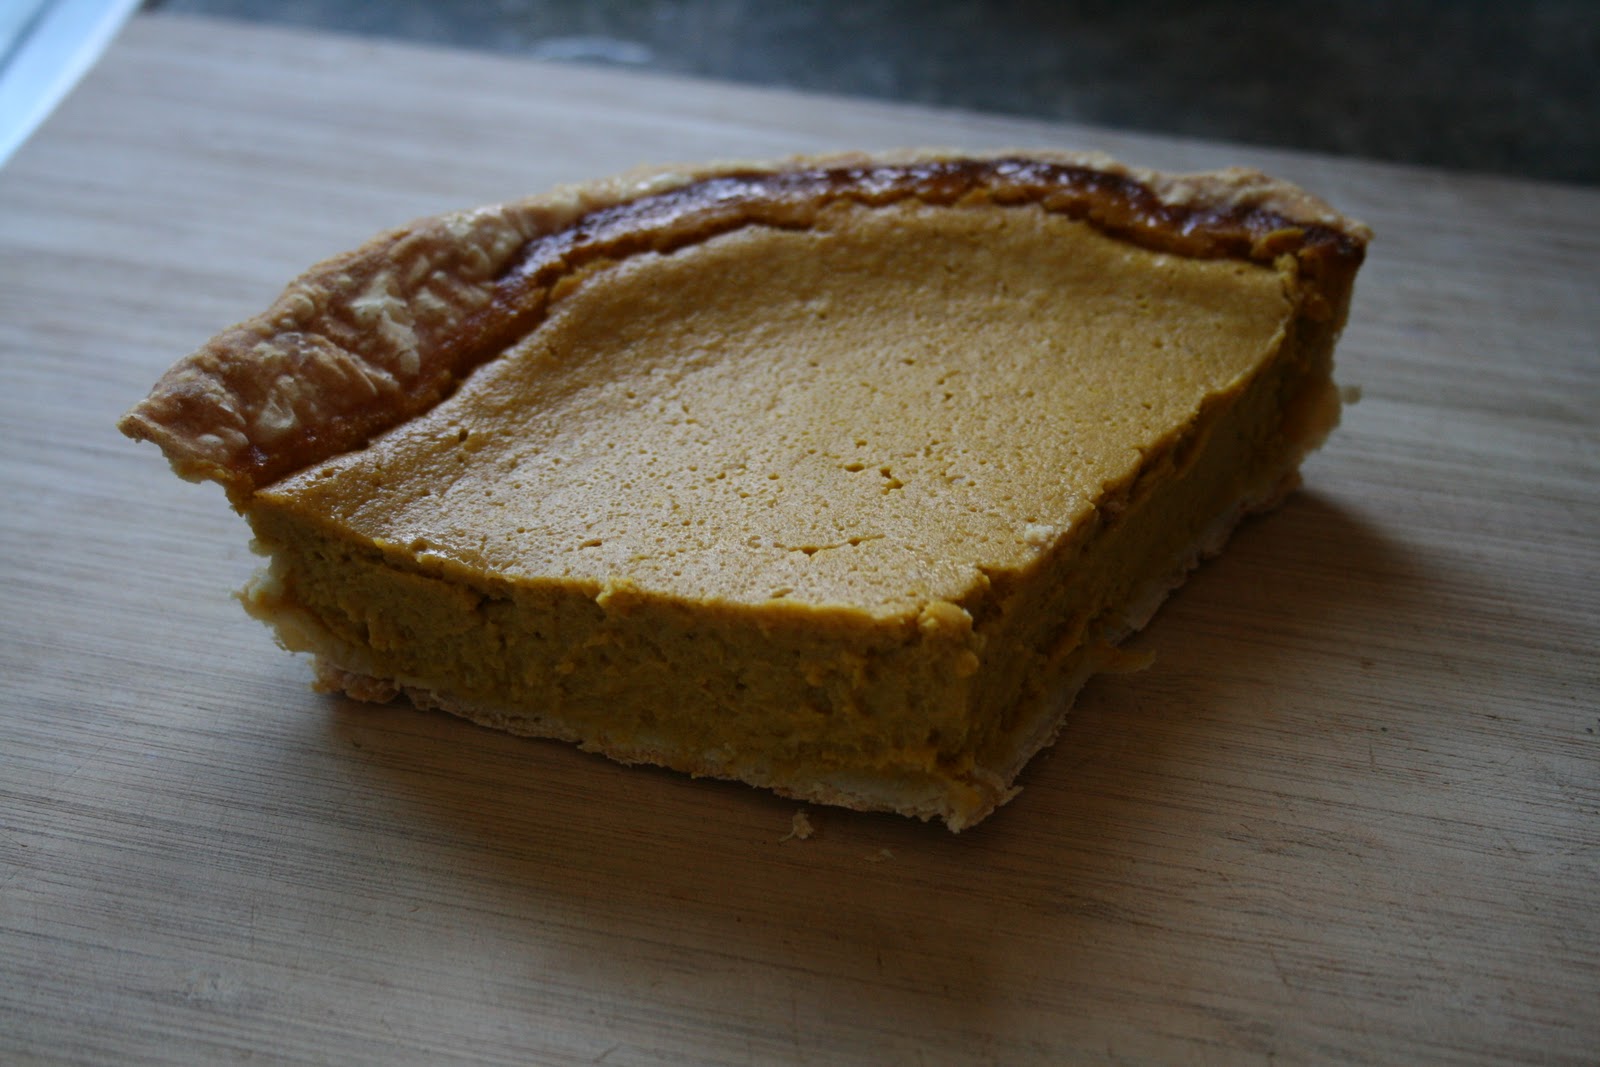
For my Thanksgiving pie, I am going to use a Cheese Pumpkin. These are supposedly very good for pumpkin pie:

Anyway, whatever kind of pumpkin you end up using, the process is pretty much the same. First, you half and deseed the pumpkin and bake it until the flesh is soft. You puree the flesh and set it aside. Next, make pastry for the crust and pre-bake it (blind). Lastly, you make the filling with the puree, fill the pastry shell and bake until set. The following recipe is adapted from 'The Art of Simple Food' by Alice Waters. It makes one 9 inch pie.
Pumpkin Puree
Cut your pumpkin in half with a heavy knife and scoop out the seeds (save, clean and roast for a snack if desired). Put both halves cut-side down on a baking sheet and bake at 350 F until tender (a butter knife slides into the flesh easily). Allow to cool, then scoop the flesh out, leaving the skin behind. If you have a food mill, put the flesh through to puree it; otherwise you can mash it with a potato masher or fork.
You will need 15 oz of your puree for one 9 inch pie. A small pumpkin should yield about that much, but a big one may result in a lot more. The cheese pumpkin above will probably be enough for 3 pies! Extra puree could be used to make pumpkin ravioli, soup, pumpkin bread, pancakes etc.
Pastry
(9 oz flour, 8 oz cold butter, 1 egg, cold water)
Follow the instructions here, allowing for the fact that you will have at least twice as much dough as you need. You can stop at 'Now put the pan in the refrigerator while you make the filling.' This will leave you with half the dough in the refrigerator, wrapped, a pie shell in a pie pan, also in the refrigerator, and some dough scraps that you cut away from the pan. Combine the scraps with the wrapped dough, press pretty flat, wrap again, tightly, and either freeze or keep in the refrigerator to use for another tart or pie. Let the pie shell rest in the fridge for a total of 1 hour, then remove, prick the base of the shell with a fork, line with foil, cover with pie weights (I use uncooked dried beans, reserved for this use) and bake for 15 minutes at 375 F. Remove foil and weights and bake another 5 or so minutes until golden. Remove from oven and allow to cool while you make the filling.
Filling
In a small saucepan, whisk 1/4 cup cream and 2 tsp flour together and boil until they thicken. Whisk in another 3/4 cup cream and boil again. Allow to cool a little. Meanwhile, in a bowl, whisk together 15 oz pumpkin puree (see above), 3 eggs, 1/2 cup brown sugar, 2 tbsp pumpkin pie spice (a mix of ground spices - usually cinnamon, ginger, nutmeg and allspice or clove), a pinch of salt and a glug of maple syrup. Lastly, whisk in the cream mixture.
Finishing
Pour the filling into your shell. Bake at 375 F for about 45 minutes - until the center of the filling is almost set. Cool on a rack, then cut and serve with whipped cream (I flavored mine with nutmeg and a little powdered sugar). Enjoy!
Note 1 - If you do not want to use fresh pumpkin, you could substitute canned pumpkin puree (not pumpkin pie filling - it should only contain pumpkin). Use the same amount. It should work OK.
Note 2 - Metric Info: 350 F = 175 C; 15 oz = 425g; 9 inches = 23 cm; 9 oz = 255g; 8 oz = 225g; 375 F = 190 C; 1/4 cup = 60 ml; 3/4 cup = 180 ml; 1/2 cup = 120 ml.
Friday, October 29, 2010
Apple Pie

'Tis the season for apple pie. Plenty of good apples available from local orchards. I went with a lattice pattern (by request) instead of a solid top. It was a bit more work, but I think it was worth it.
Start by preparing the pie dough. Put 9 oz (about 2 cups) flour into a medium-sized bowl, and add 8 oz cold butter, cut into thin slices, and a good pinch of salt. With your hands, rub the butter into the flour with your fingers until only a few large flecks are visible. Now add 1 egg, beaten, made up to 1/2 cup in volume with ice cold water (I use cold water and put the egg-water mix in the freezer for a few minutes while I rub in the butter). Knead the liquid into the flour for no more than a minute. The dough will be wet. Sprinkle over some flour and pat into a rectangle. Wrap in plastic wrap and refrigerate for 1 hour (or as long as a day if you like; you can also freeze the dough for months).
Remove the dough from the refrigerator and cut the rectangle in two. Replace one half in the fridge, and roll the other out into a thin round (use as much flour as needed to avoid it sticking to your work surface). Make sure it is big enough to line your pie pan. I used a 9 inch pan. Grease the pan with butter first, then lay the pastry in it, cutting around the edge to get rid of any overhang. Now put the pan in the refrigerator while you make the filling.
You will need a bunch of apples. I used 3 lb of Gala apples. You can use whatever kind of apple you desire, but you may not need as much as 3 lb - my pie was a little stuffed. I think it would have worked with just over 2 lb of apples.
Peel, core and slice your apples. Work quickly to avoid browning. I put the slices into a bowl and sprinkled them with a little lemon juice, then added about 1 cup brown sugar, 2 tbsp flour, 1 tsp cinnamon and a few grindings of fresh nutmeg (or a shake of ground). You could also add a small pinch of salt. If the apples are too juicy, add more flour; if they are too tart, add more sugar. Pile the apples into the pie crust and set aside. Roll out the rest of your dough (add your scraps from the shell also) to about the same thickness as you did the shell and cut long strips of roughly equal width. Using a finger dipped in water to 'glue' the strips to the pie shell, make your criss-cross lattice over the apples by alternating the directions of the strips. I started by going across the middle and worked my way towards the edges but it doesn't really matter which order you do it in.
Once you are finished assembling the pie, tidy up the edge of the crust and set your pan on a cookie sheet or similar (to collect any juice that might leak from the pie). Bake at 425 F for 25 minutes, then reduce the heat to 350 F for another 30 minutes or so, until the pastry is nicely golden and the apples are soft. Allow to cool most of the way to room temperature before serving, with cream or ice cream. Enjoy!
Note 1 - This is my favorite pie dough recipe. It is based on one in 'A Platter of Figs and Other Recipes' by David Tanis. An awesome cookbook.
Note 2 - Metric Info: 9 oz = 260g; 8 oz = 225g; 1/2 cup = 120 ml; 9 inches = 23 cm; 3 lb = 1.4 kg; 2 lb = 900g; 1 cup = 240 ml; 425 F = 220 C; 350 F = 180 C.
Monday, October 25, 2010
Pasta e Fagioli

Now, this is good winter food. Warm and hearty, pasta e fagioli (pronounced 'pasta fashool'), or Italian pasta and bean soup/stew, is perfect for those cold nights that are on the way... I already made it twice in the last month. It is one of my favorite meals, and is pretty easy to make.
Which type of beans you use is up to you. Cranberry beans are ideal, but can be hard to find. I used pinto this time, but cannellini or kidney beans are good too. You can use either dried or canned beans. I like to use dried if I have them, as they tend to hold their shape better - canned beans can get a little mushy. If using dried beans, soak 1 cup in plenty of cold water overnight. The next day, boil them in salted water until tender (beginning to get soft, offering no resistance to your teeth when you bite into them), drain and set aside to cool until needed. If using canned beans, there is no prep to do the night before.
When you are ready to make the soup, start by cutting about 2 tbsp onion (about 1/4 of an average onion) into small dice. Splash a good glug of olive oil into a large heavy saucepan and saute the onion until it starts to color. Then add about 3 tbsp carrot (peeled and diced small) and 2 tbsp celery, diced small. Stir, and add a couple of slices of bacon or pancetta, cut into small dice (this is optional - I did it on one of the two occasions, but not on the time I took the picture above). Saute until the vegetables soften - about 10 minutes. Add 2/3 cup chopped canned tomatoes and juice, and simmer until cooked down. Add either your cooked dried beans or 3 cups of canned beans (you'll probably need more than one 14 oz can). Cook for a few minutes, then add 3 cups of broth (beef, chicken, vegetable or even plain old water). Bring it to a boil. Scoop out 1/2 cup of beans and either mash them or push them through a food mill back into the soup. Taste and adjust seasoning. Bring back to a boil and add 8 oz small tubular pasta (macaroni works, but I like ditalini even better). Keep boiling (stirring as you go) until the pasta is just done (a slight bite to it - don't allow it to get too soft), then switch off the heat and stir in 1 tbsp butter and 2 tbsp hard Italian cheese, grated (parmesan, romano or asiago - I like pecorino romano myself).
Allow the soup to cool a little before serving. This recipe will serve 2-4 people, depending on how hungry they are. Enjoy!
Note 1 - Recipe adapted from one in 'Essentials of Classic Italian Cooking' by Marcella Hazan.
Note 2 - Metric Info: 1 cup = 240 ml; 2/3 cup = 160 ml; 3 cups = 700 ml; 14 oz = 400 g; 1/2 cup = 120 ml; 8 oz = 225 g.
Baked Beans (Boston-style)

Start with 1 cup of dried navy beans. I would not recommend using canned beans - they would turn to mush. You could use a different kind of bean, I suppose, but the navy bean is more authentic. Soak the beans overnight in plenty of cold water, in the fridge.
The next day, drain and rinse the beans. Place in an oven-proof pan or casserole (with lid) with enough water to cover by almost an inch. Bring to a boil, add a little salt, then reduce the heat and simmer until the beans are tender but not mushy (this will probably take at least an hour). Remove them from the heat. Stir in 5 oz bacon, diced, 2 tbsp brown sugar, 1.5 tbsp molasses and 1 tsp mustard. Quarter 2 smallish onions, and press 4 cloves into them. Add to the beans, season with a little pepper (no salt yet, as the bacon is salty), and add some hot water if necessary to cover the beans.
Put the lid on the pan and return to a simmer, then transfer into a 275 F oven. Bake for 3 hours, then remove the lid and bake for another hour. Adjust seasoning (taste, and add salt now if necessary) and serve or cool and store in your fridge for up to a week. Enjoy!
Note 1 - Enjoy the English way, on toast, or the American way, as a side with barbecued food.
Note 2 - Metric Info: 1 cup = 240 ml; 5 oz = 140 g; 275 F = 135 C.
Wednesday, October 6, 2010
Shepherd's Pie

This recipe is an amalgam of a few different ones, with a couple of adjustments of my own. It is not completely authentic, but it is good.
Start by boiling your potatoes for the mash. My pie was baked in a 9x5 inch pyrex loaf pan. I used between 1-1.5lb potatoes. I ended up with a thicker layer of mash than I needed so I would suggest that 1 lb potatoes is plenty for this recipe. I would recommend russets or chef potatoes (or any other kind of 'floury' potato). Peel them, cut them into roughly even-sized chunks and boil in salted water until cooked through. Drain in a colander, and allow to sit for a few minutes to lose some moisture. As they are sitting, heat up 1/4 -1/2 cup cream or milk until hot, and cut into small pieces 2 tbsp butter. Either mash your potatoes with a hand-held masher (or fork) - this will result in a chunky mash - or push through a food mill - this will result in a smooth mash. Incorporate your cream or milk, butter and a little salt and pepper to taste. I also stirred in a small amount of grated cheddar.
While the potatoes are boiling, you can make your filling. Chop your leftover roast lamb (I used about 10 oz, but the amount does not have to be precise) into pea-sized chunks and set aside. Chop 1 onion finely, and sweat in vegetable oil with 1 clove of garlic, minced and 1 carrot, peeled and diced very small. Add a little salt and cook gently until the carrot is soft. Add the lamb, turn up the heat a little, and make sure it browns all over. Stir in any leftover gravy or stock from your roast (or use water), 1/4 cup wine (I used white, but red is even better), 1 tbsp tomato ketchup, 1 tsp Worcestershire sauce and 1/4 - 1/2 cup frozen corn. Simmer until the liquid thickens a little and develops a nice flavor (add salt and pepper as needed). Tip into the bottom of your pie dish.
Spread your mash over your filling. Rough up the surface with a fork and cut up 1 tbsp butter into 'dots', sprinkling them over the top. Either bake now at 450 F for about 20 minutes, until the sauce is bubbling and the mash browned, or refrigerate and bake later, at the same temperature, but for longer - up to 40 minutes. Enjoy!

Note - Metric Info: 9 in = 23cm; 5 in = 13cm; 1 lb = 450g; 1/4 cup = 60ml; 1/2 cup = 120ml; 450 F = 230 C.
Sunday, September 19, 2010
Carrot Cupcakes with Cream Cheese Frosting

The cool thing about cupcakes is there is no special technique - you can use any cake batter - you just pour the batter into the prepared pan and don't bake for as long (being smaller, they will obviously cook more quickly).
This recipe is adapted from one in Alton Brown's 'I'm Just Here For More Food', a great book on the hows and whys of baking.
Combine in a bowl: 8.5 oz flour, 1 tsp baking powder, 3/4 tsp baking soda, 1 tsp ground cinnamon and 3/4 tsp salt. Peel and grate 8 oz carrots. Add the carrots to the flour mixture. Combine in another bowl: 3/4 cup vanilla yogurt, 2 oz vegetable oil, 10 oz sugar and 3 eggs. Mix well, then fold in the carrot and flour mixture. Do not over-mix.
Prepare your cupcake pan - either use paper cupcake liners or liberally grease the inside of the cups with melted butter (a pastry brush would be good here). Pour your batter into the pan - cups should be about 2/3 full. This recipe will make about one and a half pans-worth. Bake at 350 F. Check for doneness (a toothpick inserted into the center comes out clean, and the tops spring back when pressed) after 20 minutes, and return to the oven if necessary. Mine took 20-25 min. Cool in the pan for 5 minutes, then remove to finish cooling on a rack.
Once the cupcakes are cool, make the frosting: beat 2 oz softened butter and 8 oz cream cheese in a mixer with the paddle attachment (or by hand with a wooden spoon) until creamy. Add a splash of vanilla extract and then gradually add 4.5 oz confectioners (powdered) sugar with the mixer on low speed. Once everything is nicely combined, refrigerate for 10 minutes before spreading on top of your cupcakes with a knife or spatula. Enjoy!
Note 1 - I used plain yogurt instead of vanilla, and added a splash of vanilla extract to the batter with it. It was not necessary to increase the sugar.
Note 2 - Metric Info: 8.5 oz = 240g; 8 oz = 225g; 3/4 cup = 175 ml; 2 oz = 55g; 10 oz = 280g; 350 F = 175 C; 4.5 oz = 125g.
Monday, August 23, 2010
Butter Pecan Ice Cream

Start by getting together 7 oz brown sugar. Split roughly in half so that you have 2 batches.
Take 2 oz (1/2 stick) butter and melt it in a heavy-bottomed saucepan. Continue to heat over medium heat until it turns golden brown (do not allow it to get dark brown!). Turn down the heat a little and stir in 1 batch of brown sugar. Next, add 2 cups of half-and-half, stirring to make sure the sugar is dissolved. Continue to heat, but keep an eye on it, and do not allow it to boil.
Meanwhile, whisk the other batch of brown sugar with 5 egg yolks in a medium bowl. Set up another medium-large bowl on ice, with a strainer sitting on top of it. Once the half-and-half mixture is close to a boil (you can see tiny bubbles forming around the edges of the pan), ladle some of this mixture onto the yolks and whisk in. Tip the entire contents of the yolk bowl back into the saucepan, and stir constantly with a wooden spoon, continuing to heat the mixture, until it coats the back of your spoon (a line drawn in the mixture on the back of the spoon does not fill in). Once you reach this point, immediately pour the mixture through the strainer into the chilled bowl. Stir it a little to help it cool down. Transfer to the refrigerator to chill once it has cooled a little.
While your 'base' is cooling, toast 1/2 cup of pecans (I prefer to buy whole pecans, but you can use pieces - just check them sooner in the oven). Spread the nuts on a baking sheet and bake at 350 F for about 7 minutes, until lightly browned. Allow to cool completely, and cut into bite-sized pieces.
Once the 'base' is chilled, pour into an ice cream maker and churn. Once almost solid (or as close to this as your ice cream maker gets), transfer into a bowl. Stir in the nuts, trying to distribute them evenly through the ice cream. Transfer your ice cream back into a freezer-suitable container (I use plastic quart size yogurt containers) and freeze until hardened. Enjoy!
Note 1 - For those outside North America, half-and-half is half milk, half cream.
Note 2 - Be careful not to let your half-and-half mixture boil, even before adding the yolks. Mine did the first time, and it curdled, so I had to throw it out and start over.
Note 3 - Metric Info: 7 oz = 200g; 2 oz = 55g; 2 cups = 475 ml; 1/2 cup = 120 ml; 350 F = 175 C.
Subscribe to:
Posts (Atom)